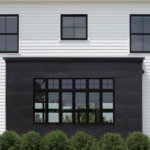
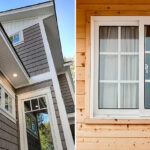
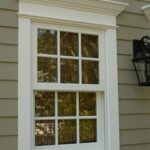
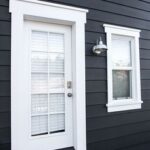
Exterior window trim not only adds visual appeal to your home, but it also serves as a protective barrier against the elements. Choosing the right window trim and installing it properly can make a significant difference in the overall look and energy efficiency of your home. In this ultimate guide, we’ll cover all you need to know about selecting and installing exterior window trim.
Choosing the Right Material

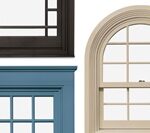
The first step in choosing exterior window trim is selecting the right material. There are several options to choose from, each with its own advantages and disadvantages.
1. Wood: Wood is a popular choice for exterior window trim because of its natural beauty and versatility. It can be painted or stained to match the look of your home, and is also easy to work with. However, wood requires regular maintenance to prevent rot and decay.
2. Vinyl: Vinyl window trim is an affordable and low-maintenance option. It is durable, weather-resistant, and does not require painting. However, it may not offer the same level of aesthetic appeal as wood.
3. PVC: PVC trim is a versatile and long-lasting option that is resistant to moisture, insects, and rot. It can be painted to match the color of your home and is easy to work with. However, it may be more expensive than other options.
4. Composite: Composite trim is a blend of wood fibers and resins that offers the look of wood without the maintenance. It is durable, moisture-resistant, and can be painted or stained. However, it may be more expensive than other options.
Measuring and Installing
Once you’ve chosen the right material for your exterior window trim, it’s important to measure and install it properly to ensure a clean and professional finish.
1. Measure the window: Before purchasing your window trim, measure the width and height of your windows to determine how much trim you will need. Be sure to account for any angles or cuts that may be necessary.
2. Cut the trim: Use a miter saw or handsaw to cut the trim to the appropriate length. Be sure to make precise cuts at the correct angles to ensure a seamless fit.
3. Install the trim: Start by applying a bead of caulk along the edge of the window frame where the trim will be placed. Then, nail the trim into place using finishing nails or a nail gun. Be sure to space the nails evenly and sink them below the surface of the trim.
4. Fill and paint: Once the trim is installed, fill any nail holes or gaps with caulk or wood filler. Sand the trim smooth, then paint or stain it to match the rest of your home’s exterior.
By following these steps and choosing the right material for your exterior window trim, you can enhance the curb appeal and energy efficiency of your home. With proper maintenance, your trim will continue to protect your windows and add to the overall aesthetics of your home for years to come.