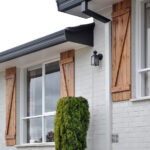
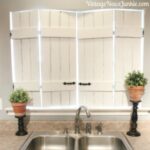
Are you looking for a simple and affordable way to elevate the look of your home? DIY shutters may be just the solution you’ve been searching for. Adding shutters to your home’s exterior can instantly boost its curb appeal and give it a more polished and finished appearance. Plus, building your own shutters can be a fun and rewarding project that allows you to put your own personal touch on your home.
To get started, here is a step-by-step guide to building DIY shutters for your home:

Step 1: Measure your windows
Before you begin building your shutters, you’ll need to measure the height and width of your windows to determine the size of the shutters you’ll need to build. Be sure to measure both the width and height of each window, as they may not all be the same size.
Step 2: Choose your materials
There are many different materials you can use to build your shutters, including wood, vinyl, and composite materials. Wood is a popular choice for its natural beauty and durability, but vinyl and composite materials are also great options for their low maintenance and weather resistance. Choose the material that best suits your needs and budget.
Step 3: Cut your materials to size
Using a saw, cut your chosen material to the size of your window measurements. Be sure to measure twice and cut once to ensure a precise fit.
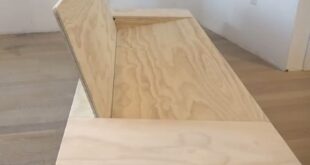
Step 4: Assemble your shutters
Once you have cut your materials to size, it’s time to assemble your shutters. If you’re using wood, you can use wood glue and screws to attach the individual pieces together. If you’re using vinyl or composite materials, follow the manufacturer’s instructions for assembly.
Step 5: Paint or stain your shutters
Now that your shutters are assembled, it’s time to add some color. Choose a paint or stain that complements your home’s exterior and adds to its overall aesthetic. Be sure to prime your shutters before painting or staining to ensure a smooth and long-lasting finish.
Step 6: Install your shutters
Once your shutters are painted or stained and dried, it’s time to install them on your home. Use screws or hinges to attach the shutters to your windows, making sure they are securely fastened and level.
And there you have it – a simple and cost-effective way to elevate the look of your home with DIY shutters. By following these steps, you can create custom shutters that add charm and character to your home’s exterior. So why wait? Start building your own shutters today and give your home the upgrade it deserves.