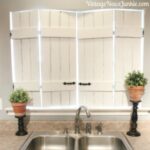
Shutters are a great way to add style and character to your home. They provide privacy, control light, and protect your home from the elements. However, purchasing custom-made shutters can be expensive. If you’re looking to save money and add a personal touch to your home, consider making your own DIY shutters.
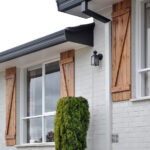
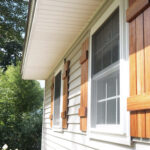
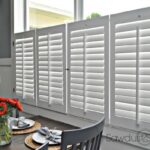
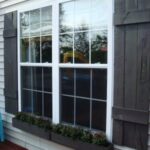
There are many different styles of shutters to choose from, including traditional louvered shutters, board and batten shutters, and raised panel shutters. Each style has its own unique charm and can complement different architectural styles, so choose the style that best fits your home.
To make DIY shutters, you’ll need a few basic materials and tools. Here’s a simple guide to help you make your own custom shutters:
Materials: – Wood boards (cedar or pine are good choices for their durability) – Hinges – Screws – Sandpaper – Primer and paint or stain
Tools: – Saw – Drill – Screwdriver – Measuring tape – Sanding block
Step 1: Measure your windows. Determine the size of the shutters you’ll need based on the dimensions of your windows. Take into account the width and height of the window, as well as the spacing between the shutters.
Step 2: Cut the wood boards to size. Use a saw to cut the boards to the correct dimensions for your shutters. If you’re making louvered shutters, be sure to cut the slats to the correct width.
Step 3: Sand the wood. Use sandpaper or a sanding block to smooth out any rough edges and surfaces on the wood boards.
Step 4: Assemble the shutters. Attach the slats to the frame of the shutter using screws and a drill. If you’re making board and batten shutters, attach the vertical boards first, then add the horizontal boards.
Step 5: Paint or stain the shutters. Apply a coat of primer to the shutters, then paint or stain them in the color of your choice. Be sure to use outdoor paint or stain if you’ll be installing the shutters outside.
Step 6: Install the shutters. Attach hinges to the shutters and then install them on your windows using screws. Be sure to follow any installation instructions provided with the hinges.
With just a few materials and some basic tools, you can create stylish and functional DIY shutters for your home. Whether you’re looking to add a touch of charm to your windows or update your home’s exterior, making your own shutters is a budget-friendly and rewarding DIY project. Give it a try and see how much of a difference custom shutters can make in your home.