Garden slabs are an essential element in landscaping, providing a practical and aesthetically pleasing solution for creating a stable and durable surface in outdoor spaces. Whether you are planning to create a patio, pathway, or seating area in your garden, choosing the right garden slabs is crucial to achieving a cohesive and functional design. In this article, we will provide a complete guide to help you choose and install garden slabs effectively.
Choosing Garden Slabs:
1. Material: Garden slabs come in a variety of materials, each with its unique characteristics and benefits. The most common materials used for garden slabs are natural stone, concrete, and porcelain. Natural stone slabs like sandstone, limestone, and granite offer a rustic and natural appearance, while concrete slabs are more affordable and versatile. Porcelain slabs are a modern and durable option that is resistant to stains, scratches, and frost.
2. Size and Shape: Consider the size and shape of the garden slabs based on the area where you plan to install them. Small slabs are suitable for creating intricate patterns and designs, while larger slabs are ideal for larger surfaces like patios and pathways. Choose shapes that complement the overall design of your garden, such as rectangular, square, or irregular shapes.
3. Texture and Finish: The texture and finish of garden slabs play a significant role in both the aesthetics and functionality of the space. Smooth and polished finishes offer a contemporary look and are easy to clean, while textured and riven finishes provide a natural and slip-resistant surface. Consider the intended use of the area when choosing the texture and finish of the slabs.
Installing Garden Slabs:
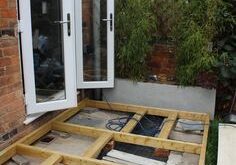
1. Preparation: Before installing garden slabs, prepare the area by clearing any vegetation, debris, or obstacles. Mark the layout of the slabs using stakes and string, ensuring that the area is level and has proper drainage. Dig out the soil to a depth of at least 5-6 inches, or deeper depending on the type of base material you plan to use.
2. Base Material: The base material serves as a foundation for the garden slabs, providing stability and preventing movement over time. Common base materials used include MOT Type 1, sharp sand, and gravel. Spread and compact the base material evenly using a plate compactor or tamper to create a level surface for the slabs.
3. Lay the Slabs: Start laying the garden slabs from one corner of the area, following the layout you have marked. Use a rubber mallet to tap the slabs into place and ensure they are level and aligned with each other. Maintain consistent spacing between the slabs using spacers or joints, depending on the desired look.
4. Jointing and Finishing: Once all the garden slabs are laid, fill the joints with a jointing compound like sand or mortar to provide additional stability and prevent weed growth. Use a brush to sweep the compound into the joints and remove any excess material. Seal the slabs with a sealant to protect them from stains, weathering, and UV damage.
By following this complete guide to choosing and installing garden slabs, you can create a beautiful and functional outdoor space that enhances the overall appearance of your garden. Take your time to research different materials, sizes, and finishes to find the best garden slabs that suit your needs and preferences. With proper preparation and installation techniques, you can enjoy a long-lasting and attractive patio, pathway, or seating area in your garden.