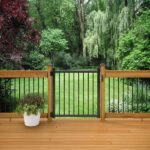
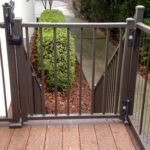
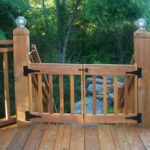
A deck gate is an important safety feature for any outdoor space, but that doesn’t mean it has to be boring or unsightly. In fact, with a little creativity and some basic woodworking skills, you can build a secure and stylish deck gate that complements the look of your deck and adds a touch of personality to your outdoor oasis.
Step 1: Measure and Plan
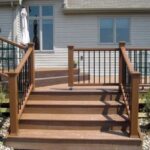
Before you begin building your deck gate, take accurate measurements of the opening where the gate will be installed. This will ensure that your gate fits properly and operates smoothly. Consider the height of the gate as well, making sure it is tall enough to keep small children and pets safe inside the deck area.
Next, decide on the style and design of your gate. Will it be a simple, classic design or something more elaborate with decorative accents? Consider the overall aesthetic of your deck and choose a design that complements it.
Step 2: Gather Materials and Tools
Once you have your measurements and design in place, gather the materials and tools you will need to build your deck gate. You will need:
– Wood for the gate frame – Wood for the gate slats – Hinges – Latch – Screws – Drill – Saw – Sandpaper – Paint or stain (optional)
Step 3: Build the Frame
Start by building the frame of your gate. Cut your pieces of wood to the correct length and width according to your measurements. Use a drill and screws to assemble the frame, making sure it is sturdy and square.
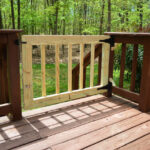
Step 4: Add the Slats
Next, attach the slats to the frame of the gate. Cut your slats to size and space them evenly across the frame. Use screws to secure them in place, making sure they are evenly spaced and straight.
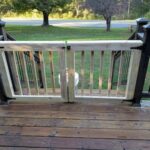
Step 5: Install the Hardware
Once your gate is assembled, it’s time to install the hardware. Attach the hinges to one side of the gate and the gate post, making sure they are secure and the gate operates smoothly. Install a latch on the opposite side to keep the gate closed when not in use.
Step 6: Sand and Finish
Once your gate is fully assembled and installed, sand down any rough edges and corners to ensure a smooth finish. If desired, you can paint or stain your gate to match the rest of your deck.
Building a secure and stylish deck gate is a fun and rewarding project that can be completed in just a few hours. By following these simple steps and using your creativity, you can create a gate that not only keeps your outdoor space safe but also adds an element of design and personality. So grab your tools and get to work on building the perfect deck gate for your home!