Garden slabs are a great way to enhance the look and functionality of your outdoor space. Whether you’re planning to create a patio, pathway, or seating area, choosing the right slabs and installing them correctly is key to achieving a beautiful and durable result. In this complete guide, we will take you through everything you need to know to select and install garden slabs.
Choosing the Right Slabs When it comes to choosing garden slabs, there are a few key factors to consider:
1. Material: Garden slabs come in a variety of materials, including concrete, natural stone, and porcelain. Each material has its own unique look, durability, and maintenance requirements. Concrete slabs are cost-effective and easy to install, while natural stone slabs add a touch of luxury and elegance to your outdoor space. Porcelain slabs are incredibly durable and low-maintenance, making them a popular choice for contemporary gardens.
2. Size and Shape: Garden slabs come in a range of sizes and shapes, from small square pavers to large rectangular slabs. Consider the size and layout of your outdoor space when choosing the shape and size of your slabs. Smaller slabs are ideal for creating intricate patterns and designs, while larger slabs are perfect for covering larger areas quickly.
3. Color and Finish: Garden slabs are available in a wide range of colors and finishes, from natural stone hues to bold and vibrant shades. Consider the overall style and color scheme of your garden when choosing the color and finish of your slabs. Lighter colors can make a small space feel more open and airy, while darker colors can create a cozy and intimate atmosphere.
Installing Garden Slabs Once you’ve chosen the right slabs for your garden, it’s time to start the installation process. Here are some tips to help you install garden slabs correctly:
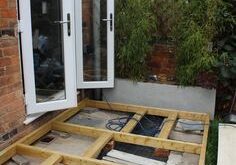
1. Prepare the Ground: Before laying your slabs, it’s important to prepare the ground properly. Clear the area of any debris, weeds, and vegetation, and ensure the ground is level and compacted. You may need to excavate the area and add a layer of hardcore or sand to create a stable base for your slabs.
2. Lay the Slabs: Start by laying the first row of slabs along one edge of the area, using a rubber mallet to tap them into place. Ensure the slabs are level and have a consistent gap between them. Use a spirit level and string line to guide you and ensure your slabs are laid in a straight line.
3. Cut and Fit: Depending on the layout of your garden, you may need to cut some slabs to fit around obstacles or create a specific pattern. Use a diamond-blade saw or a bolster and hammer to cut the slabs to size, and ensure the edges are neat and smooth.
4. Finish the Edges: Once all the slabs are laid, finish the edges with a border of bricks or pavers to create a clean and polished look. You can also add a layer of jointing sand or mortar between the slabs to secure them in place and prevent weeds from growing between them.
By following these tips and guidelines, you can select and install garden slabs that will enhance the beauty and functionality of your outdoor space for years to come. Whether you’re creating a small patio or a large seating area, choosing the right slabs and installing them correctly will ensure a stunning and long-lasting result.